Reverse Prepaid (PPD) and Refund the Client
When you have a prepaid balance that you need to refund to a client, there are two steps involved; first you reverse the prepaid amount, and then you can create a quick check to refund the amount to the client.
Reverse a prepaid (PPD) amount
NOTE: This credits your prepaid (PPD) cash asset account and debits your PPD liability account.
To reverse a prepaid amount:
-
Start Juris and log in to open the main Juris window.
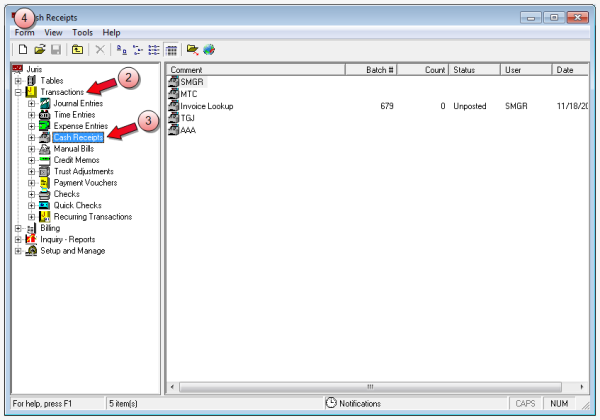
- Double-click Transactions to expand the folder.
- Click Cash Receipts.
-
Select Form > New > Cash Receipt on the menu to open a new batch window.
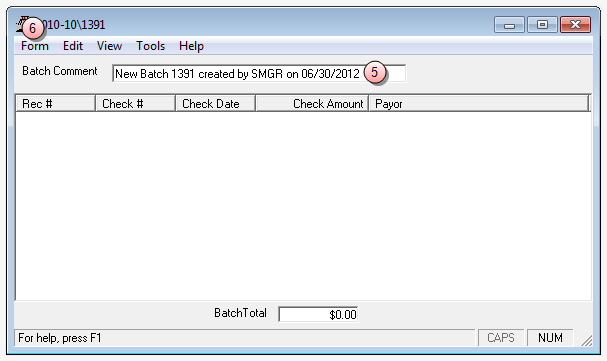
- In the Batch Comment box, type a name for this batch, or skip this step to accept the default.
-
Select Form > New on the menu to open a new cash receipts window.
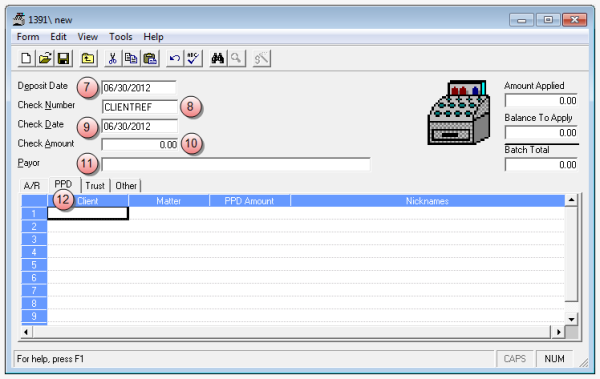
- In the Deposit Date box, type a deposit date, or skip to accept the default of today's date.
- In the Check Number box, type CLIENTREF.
- In the Check Date box, type a date or leave it set to today's date.
- In the Check Amount box, ensure that it is a zero amount. If not, type 0.00.
- Leave the Payor box empty, it is automatically populated when you enter the matter number on the PPD tab.
-
Click the PPD tab, and enter the client and matter information, along with the refund as a "negative" dollar amount.
 PPD tab steps
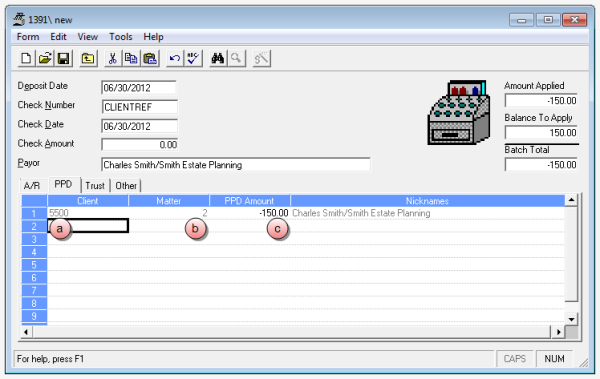
- In the Client column, type the client number.
- In the Matter column, type the matter number.
- In the PPD Amount column, type the amount of the refund, as a "negative" amount.
-
Click the Other tab, and enter the bank code, account number, and amount, as a "positive" dollar amount.
 Other tab steps
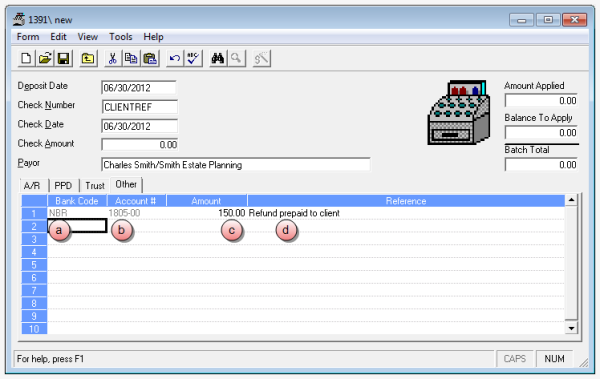
- In the Bank Code column, type the code for the bank that the check will be written from. If you do not know the code, right-click in the column row to open the Bank Account Finder window where you can select the code.
- In the Account # column, type an account number, or right-click in the column row to open the Chart of Accounts Finder window where you can search for, and select a code.
- In the Amount column, type the amount of the refund as a "positive" dollar amount.
- In the Reference column, type a short description for the action.
You can use any account number you want, as you will be offsetting it with a check (refund) to the Client.
Warning: Do not enter the account number in the Bank Code box.
- Select Form > Save on the menu to save the cash receipt.
- Click the window Close button to close the cash receipt window.
- Click the window Close button on the batch window to close the window.
- Post the cash receipt batch. See Post a transaction batch for instructions.
You are ready to create the refund quick check to send to the client.
Refund the client
To provide a refund for the client, you create a quick check with which to pay the client. This action debits and credits your operating account thus having no effect on your G/L cash account. The debit to the PPD liability account and the credit to your PPD asset account were made with the negative cash receipt entries.
To refund the client:
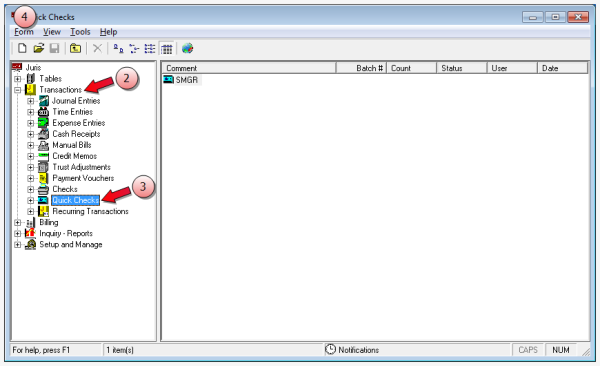
- Start Juris and log in to open the main Juris window.
- Double-click Transactions to expand the folder.
-
Click Quick Checks.
TIP: Quick Checks allows you to enter a check and a voucher simultaneously.
-
Select Form > New > Quick Check on the menu to open a new batch window.
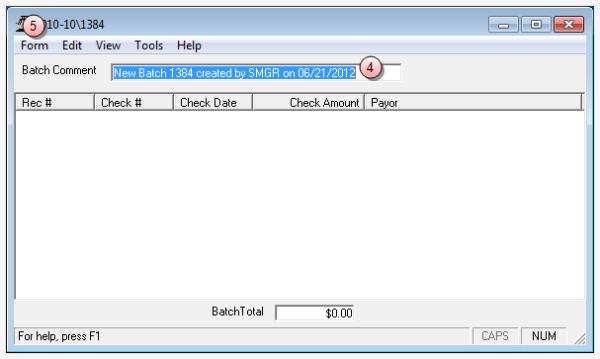
- In the Batch Comment box, type a name for this batch, or skip this step to accept the default.
-
Select Form > New on the menu to open the Quick Check window.
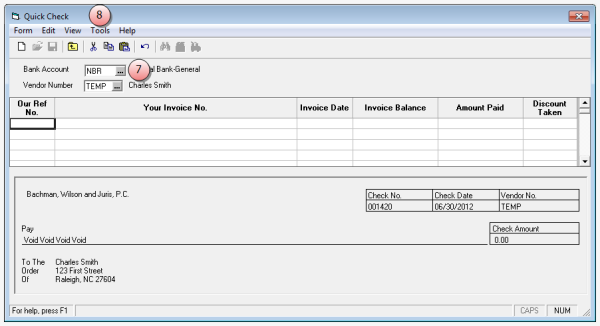
-
In the Bank Account box, type the bank account from which you are pulling the refund, or click the ... (ellipses) button to select it from a list.
-
Select Tools > Temp Vendor on the menu, and create a temporary vendor account for the client.
 Temporary vendor setup steps
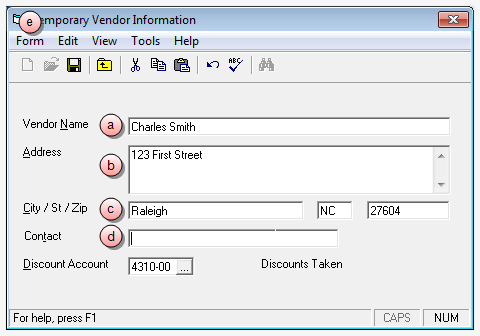
- In the Vendor Name, type the name of the client for whom the check is being created.
- In the Address box, type the client's address.
- In the City / St / Zip boxes, type in the appropriate city, state, and zip code information of the client.
- In the Contact box, type the name of the person to contact, if the vendor is a company, or if the person to contact is different than the client name.
- Select Form > Save on the menu to save the temporary vendor.
The 'Vendor Number' box on the Quick Check is automatically populated with the word TEMP to indicate that this is a temporary vendor.
- Select Form > New on the menu to add a new row in which to enter a payment.
-
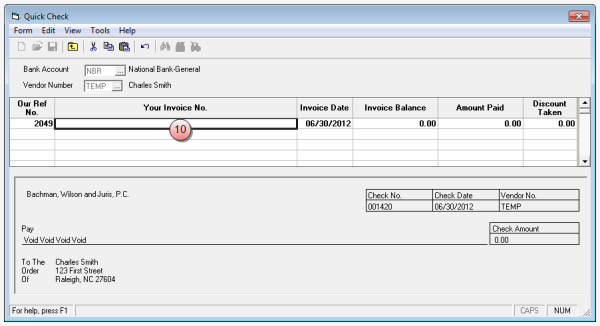
Double-click the Your Invoice No. column to open the Quick Checks detailed voucher window.
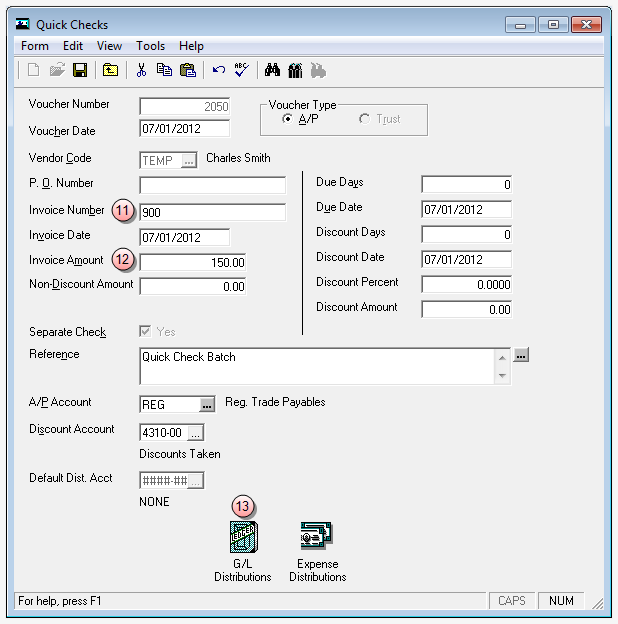
- In the Invoice Number box, type the invoice number you want to use.
-
In the Invoice Amount box, type the same dollar amount that you entered in the 'Amount' column, on the Other tab in the Cash Receipt.
-
Double-click the G/L Distributions icon at the bottom of the detailed voucher window, enter the same G/L distribution account and amount you entered on the 'Other" tab of the Cash Receipt you created, and then save it.
 G/L distribution steps
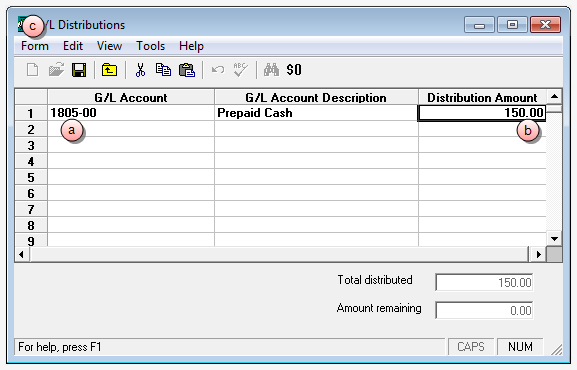
- In the G/L Account column, type the same account number that you entered in the 'Account #' column, on the Other tab in the Cash Receipt.
- In the Distribution Amount column, type the same dollar amount that you entered in the 'Amount' column, on the Other tab in the Cash Receipt.
- Click Form > Save on the menu to save the G/L distributions, and return to the detailed voucher window.
- Select Form > Save on the menu in the detailed voucher window to save your entries.
- Click the window Close button to close the detailed voucher window.
-
Select Form > Save on the menu.
A Check Printing window opens.
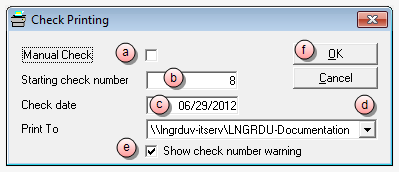
- Optionally, select the Manual Check check box, if you intend to hand-write a check. Ensure that the check box is NOT selected in you intend to print the check.
- In the Check Number box, verify that the starting check number is correct, or if hand-writing a check, type in the check number.
- In the Check date box, type a date, or use the default (today's date.)
- Click the Print To arrow to select the printer where you want to print the check.
- Ensure that the Show check number warning check box is selected, if you want the system to warn you if the starting check number is out of sequence.
- Click OK.
NOTE: If you are printing the check(s), ensure that you have check stock in the selected printer before you click the OK button, as the check(s) start printing immediately.
- Click the window Close button on the Quick Check window to close it.
-
Click the window Close button on the Quick Checks batch window to close it.
The process is complete. All you need to do now is mail the check to the client.
Warning: 1099's cannot be generated for temporary vendors, so a Temporary Vendor should not be used for any client/vendor requiring a 1099.
This action lets you setup a new payment voucher.
NOTE: The program credits and debits the account you used for the G/L Distribution and the Cash Receipt. The credit comes from the Cash Receipt you entered and the debit comes from the check you write.
The quick check is populated with the information you entered in the detailed voucher window.
Debit and credit overview
| G/L | ||
| Original deposit to PPD | Reverse of PPD | Check to client |
| Debit PPD Asset | Credit PPD Asset | Debit Operating Account |
| Credit PPD Liability | Debit PPD Liability | Credit Operating Account |
| Net results = 0 | ||
| Checkbook | ||
| Original deposit to PPD | Reverse of PPD | Check to client |
| Debit to PPD Asset or Operating | Credit to PPD Asset or Operating | Credit ONLY hits the checkbook |
| Add entry | ||
| Debit PPD Asset or Operating | ||
NOTE: Check reconciliation processing dictates that the original deposit and the check to the client be cleared. The "Add entry" is necessary to offset the reversal of prepaid.